CAPX(Cluster API Provider Nutanix Cloud Infrastructure)で、Nutanix CE に Kubernetes 環境を構築してみます。
入口はこちら。
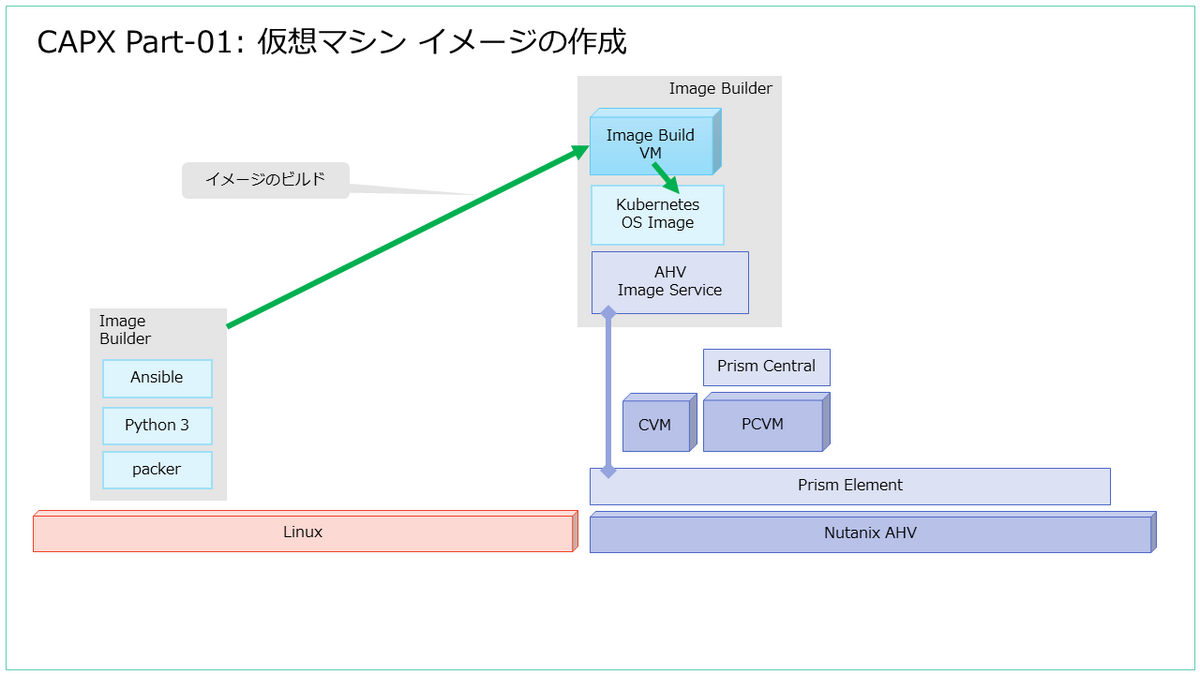
今回は、CAPX で使用する Kubernetes ノード仮想マシンのイメージを作成します。
イメージ作成の手順は、下記が参考になります。
今回の内容です。

今回の環境
CAPX では、Prism Central が必要になります。今回は下記のように、Nutanix CE 上に Prism Central を用意してあります。
仮想マシン イメージ作成の作業マシンとして、Linux マシンを使用しました。今回は、Oracle Linux 8 を使用しています。
[root@lab-capi-01 ~]# cat /etc/oracle-release
Oracle Linux Server release 8.9
1. 仮想マシン イメージ作成の環境準備
まずは、前提となるパッケージをインストールしておきます。
# dnf install git make jq unzip python3.11 python3.11-pip -y
GitHub から、Cluster API 用の仮想マシン イメージを作成する Image Builder のリポジトリをダウンロードします。
# git clone https://github.com/kubernetes-sigs/image-builder.git
ディレクトリを移動します。
# cd image-builder/images/capi/
Nutanix AHV むけのイメージを作成するための環境を準備します。この make コマンドで、Ansible や Packer がインストールされます。
# make deps-nutanix
ansible の自動インストールが失敗した場合の対応
ansible がインストールされていないという Warning が表示された場合は、手動で Ansible をインストールしておきます。
# pip3 install ansible
# export PATH=/root/.local/bin:$PATH
ansible を手動で追加インストールした場合は、ansible コマンドが実行できるようになったことを確認しておきます。
# ansible --version
ansible [core 2.16.1]
  config file = /root/image-builder/images/capi/ansible.cfg
  configured module search path = ['/root/.ansible/plugins/modules', '/usr/share/ansible/plugins/modules']
  ansible python module location = /root/.local/lib/python3.11/site-packages/ansible
  ansible collection location = /root/.ansible/collections:/usr/share/ansible/collections
  executable location = /root/.local/bin/ansible
  python version = 3.11.5 (main, Nov 15 2023, 18:13:17) [GCC 8.5.0 20210514 (Red Hat 8.5.0-20.0.1)] (/usr/bin/python3.11)
  jinja version = 3.1.2
  libyaml = True
Ansble を手動インストールした場合は、make deps-nutanix を再実行して、Warning が表示されずに、処理が完了することを確認します。
$ make deps-nutanix
2. 仮想マシン イメージの作成
イメージを作成する環境を定義する JSON ファイルを作成します。これのファイルは直前の make コマンドで用意されますが、デフォルトでは、なにも定義されていません。
# cat packer/nutanix/nutanix.json
{}
このファイルは、下記のように記載します。nutanix_subnet_name に指定する AHV ネットワークでは、IPAM を有効にしておきます。これは、このマシンから、イメージ作成中に起動される仮想マシンにアクセスできるように、IP アドレス プールやデフォルト ゲートウェイを設定しておきます。
{
  "nutanix_endpoint": "Prism Central IP / FQDN",
  "nutanix_port": "9440",
  "nutanix_insecure": "true",
  "nutanix_username": "Prism Central Username",
  "nutanix_password": "Prism Central Password",
  "nutanix_cluster_name": "Prism Element Cluster Name",
  "nutanix_subnet_name": "AHV Subnet Name"
}
今回は、下記のようにパラメータを設定しています。
{
  "nutanix_endpoint": "lab-nxpc-01.go-lab.jp",
  "nutanix_port": "9440",
  "nutanix_insecure": "true",
  "nutanix_username": "admin",
  "nutanix_password": "パスワード",
  "nutanix_cluster_name": "lab-nxce-01",
  "nutanix_subnet_name": "nw-vlan-12"
}
下記の make コマンドを実行して、仮想マシン イメージをビルドします。今回は、Ubuntu 2204 の仮想マシンです。
# make build-nutanix-ubuntu-2204
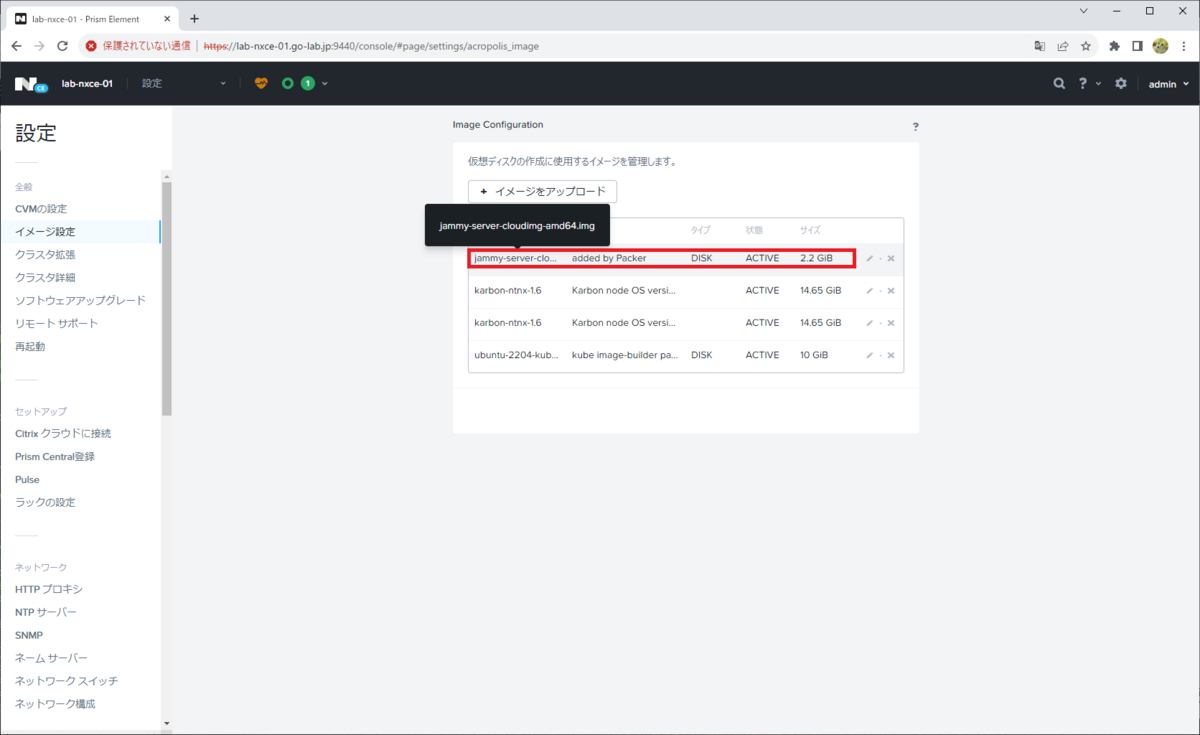
処理中に、イメージ サービスに Ubuntu のディスク イメージ(jammy-server-cloudimg-amd64.img)が登録されます。

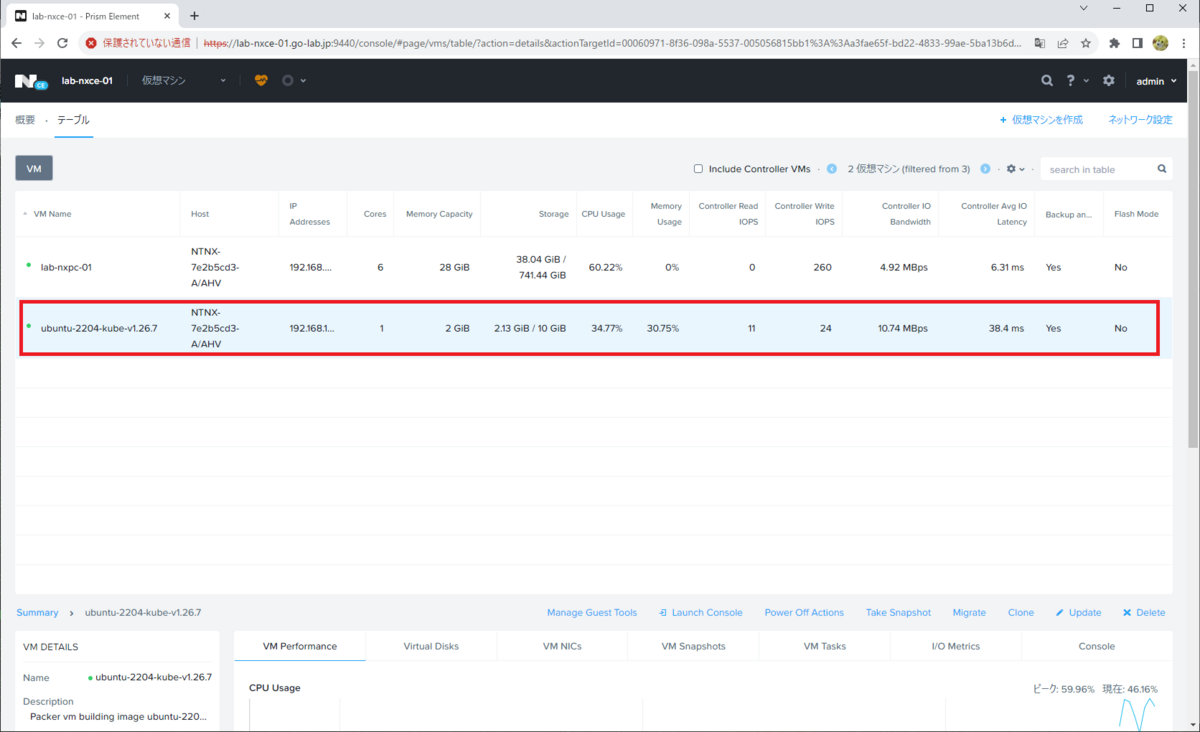
このディスク イメージから仮想マシン(ubuntu-2204-kube-v1.26.7)が作成 → 起動されて、Packer や Ansible によってゲスト OS が Kubernetes ノード用に準備されたディスク イメージが作成されます。

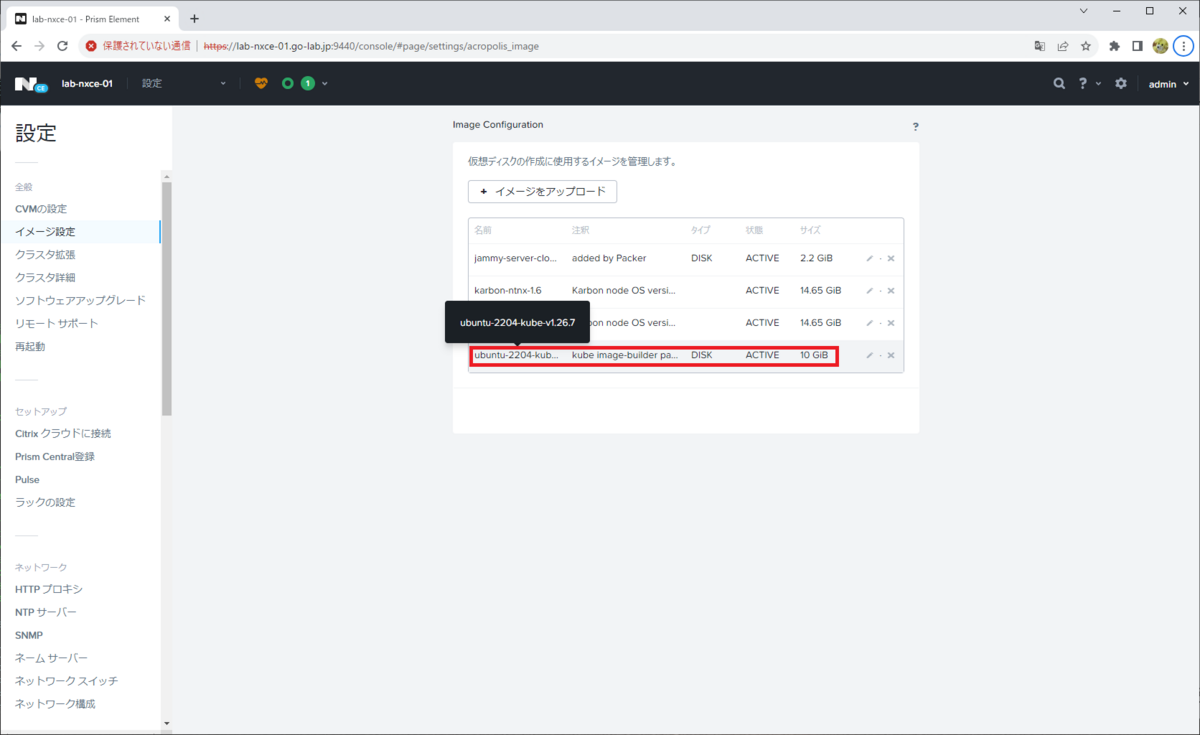
ゲスト OS の準備が終わると、最終的にイメージ サービスにディスク イメージ(ubuntu-2204-kube-v1.26.7)が登録されます。そして、この元になる仮想マシンは削除されます。

ビルド処理が成功すると、最終的に下記のように表示されます。
==> Wait completed after 10 minutes 15 seconds

==> Builds finished. The artifacts of successful builds are:
--> nutanix: ubuntu-2204-kube-v1.26.7
--> nutanix: ubuntu-2204-kube-v1.26.7
これで、CAPX 用の仮想マシン イメージが作成されました。
つづく。
