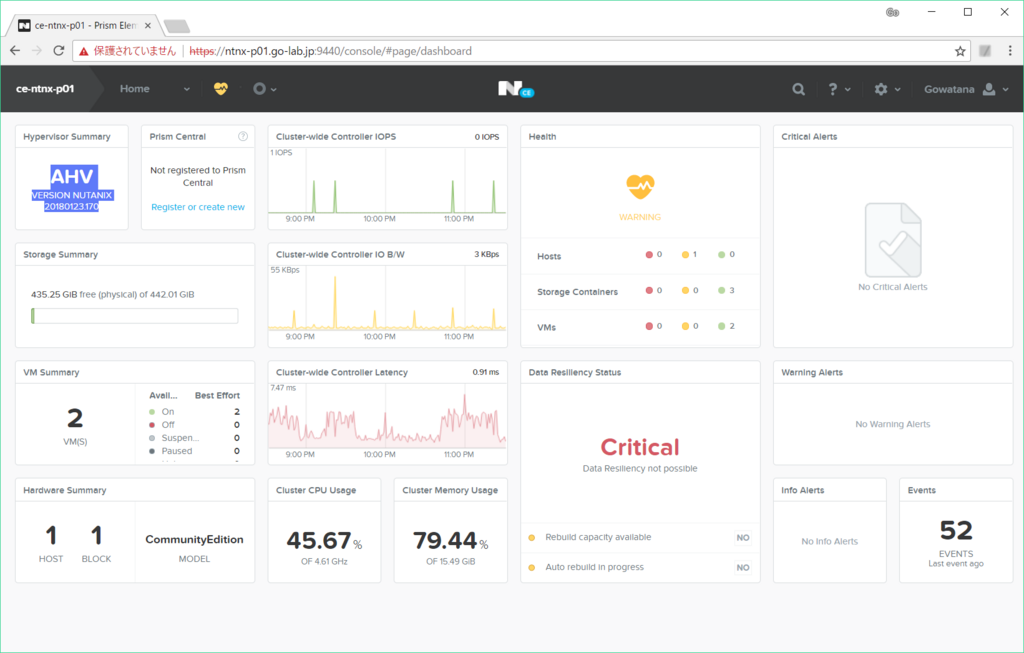
Nutanix CE で AHV に取り組むときに、まず意識するとよいかなと思うところを 5つ挙げてみました。
「基本的には」ということで、当然ながら例外はありますが・・・
- 1. 通常運用の操作は、すべて Prism から実施する。
- 2. AHV のコマンドライン操作には、CVM の acli を使用する。
- 3. AHV にはできるだけ直接ログインしない。
- 4. 仮想スイッチは、直接 AHV で設定変更しない。
- 5. AHV の Linux OS / KVM の設定は変更しない。
1. 通常運用の操作は、すべて Prism から実施する。
AHV は実のところ KVM です。しかし、一般的な RHEL や CentOS での KVM で利用されるようなツール(たとえば virsh など)を利用するケースは、例外的なものと考えておくとよいです。
定常の運用で VM 作成 / 設定変更 / 起動 / 停止 や、仮想ディスクの作成、ネットワークの追加などは、Prism から実施できます。ハイパーバイザが ESXi の場合よりも Prism のカバー範囲が広いので、まずは Prism での操作を基本とするとよいと思います。

2. AHV のコマンドライン操作には、CVM の acli を使用する。
Prism の代わりになる Nutanix ならではのコマンドライン ツールは、 ncli と acli の 2つです。どちらも、CVM に SSH 接続して利用します。
このうち、AHV をコマンドラインで操作する場合は acli を利用します。
nutanix@NTNX-d9bf69a4-A-CVM:192.168.1.232:~$ acli help
Namespaces:
  ads
  core
  ha
  host
  image
  iscsi_client
  microseg
  net
  nf
  parcel
  snapshot
  task
  uhura
  vg
  vm
  vm_group

Aliases:
  exit
  get
  help
  quit
  set
ncli コマンドがハイパーバイザによらない Nutanix の操作をするのに対して、acli は AHV 特有の操作を受け持ちます。
ちなみにハイパーバイザが AHV ではない環境での acli は実行できるコマンドが減ります。実行できるコマンドは「acli help」で確認できるはずです。
3. AHV にはできるだけ直接ログインしない。
通常運用での AHV への直接ログイン(SSH やコンソールなどの)は避けるほうがよいようです。
どうしてもアクセスしたい場合は、できるだけ CVM 経由にします。下記のように CVM の nutanix ユーザ → CVM の root ユーザは、パスワードなしで SSH できるようになっています。各ホストの AHV は必ず 192.168.5.1 の IP アドレスを持ちます。
nutanix@NTNX-d9bf69a4-A-CVM:192.168.1.232:~$ ssh root@192.168.5.1 cat /etc/nutanix-release
FIPS mode initialized
el7.nutanix.20180123.170
nutanix@NTNX-d9bf69a4-A-CVM:192.168.1.232:~$
ちなみに、virsh も CVM から実行できるようになっています。
nutanix@NTNX-d9bf69a4-A-CVM:192.168.1.232:~$ virsh list
 Id    Name                           State
----------------------------------------------------
 1     NTNX-d9bf69a4-A-CVM            running
 3     c8e98a0e-83e8-416d-a791-39d54b0d41db running
とはいっても「ESXi には直接ログインしない」と同じようなニュアンスかなと思います。ESXi に積極的に SSH することを好むところでは、AHV にも同様になるかなと思います。
4. 仮想スイッチは、直接 AHV で設定変更しない。
デモ用途の Nutanix CE の AHV であれば、仮想スイッチ(Open vSwitch / Linux Bridge)で設定変更するのは、主にチーミング(Bonding)のポリシーの変更と、ブリッジ(ESXi の vSS にあたる)の追加かなと思いますが、その場合はできるだけ CVM の manage_ovs コマンドを使用します。manage_ovs で変更できない設定のみ、AHV の Open vSwitch の管理コマンドで直接変更します。
manage_ovs コマンドでは下記のようなことができます。
nutanix@NTNX-d9bf69a4-A-CVM:192.168.1.232:~$ manage_ovs
2018-04-14 14:47:07 CRITICAL manage_ovs:588 Select an action:
delete_single_bridge
create_single_bridge
show_uplinks
show_interfaces
update_uplinks
disable_bridge_chain
show_bridges
enable_bridge_chain
たとえば CVM から AHV のブリッジやアップリンクの確認 / 設定変更ができます。
nutanix@NTNX-d9bf69a4-A-CVM:192.168.1.232:~$ manage_ovs show_uplinks
Bridge br0:
  Uplink ports: enp0s31f6
  Uplink ifaces: enp0s31f6
help の抜粋です。
nutanix@NTNX-d9bf69a4-A-CVM:192.168.1.232:~$ manage_ovs --help | cat -n | head -n 72
     1
     2  USAGE: manage_ovs [flags]
     3
     4  Where  is one of the following:
     5
     6    show_bridges: Shows a list of the uplink bridges.
     7    show_interfaces: Shows a list of host physical interfaces.
     8    show_uplinks: Shows the current uplink configuration for the OVS bridge.
     9    update_uplinks: Updates the uplink configuration for the OVS bridge.
    10    enable_bridge_chain: Enables bridge chaining on the host.
    11    disable_bridge_chain: Disables bridge chaining on the host.
    12
    13  The update_uplinks action requires the --interfaces flag, which indicates the
    14  desired set of uplinks for the OVS bridge. The script will remove any existing
    15  uplinks from the bridge, and replace them with the specified set of uplinks on
    16  a single bonded port.
    17
    18  flags:
    19
    20  /usr/local/nutanix/cluster/bin/manage_ovs:
    21    --bond_name: Bond name to use
    22    --bridge_name: Openvswitch on which to operate
    23      (default: '')
    24    --[no]dry_run: Just print what would be done instead of doing it
    25      (default: 'false')
    26    --[no]enable_vlan_splinters: Enable VLAN splintering on uplink interfaces
    27      (default: 'true')
    28    --[no]force: Reconfigure the bridge even if the the set of uplinks has not
    29      changed
    30      (default: 'false')
    31    -?,--[no]help: show this help
    32    --[no]helpshort: show usage only for this module
    33    --[no]helpxml: like --help, but generates XML output
    34    --host: Host on which to operate
    35      (default: '192.168.5.1')
    36    --interfaces: Comma-delimited list of interfaces to configure as bridge
    37      uplinks, or a keyword: all, 40g, 10g, 1g
    38    --[no]json: Output in json format.
    39      (default: 'false')
    40    --mtu: Maximum transmission unit
    41      (an integer)
    42    --num_arps: Number of gratuitous ARPs to send on the bridge interface after
    43      updating uplinks
    44      (default: '3')
    45      (an integer)
    46    --[no]prevent_network_loop: Enables network loop prevention when bridge chain
    47      is enabled.
    48      (default: 'false')
    49    --[no]require_link: Require that at least one uplink has link status
    50      (default: 'true')
    51
    52  acropolis.hypervisor.flags:
    53    --acropolis_hypervisor_connect_timeout_sec: Number of seconds after which
    54      hypervisor connection attempt times out.
    55      (default: '10')
    56      (an integer)
    57    --acropolis_hypervisor_reconnect_delay_sec: The hypervisor reconnection delay
    58      in seconds.
    59      (default: '2')
    60      (an integer)
    61    --acropolis_xen_connection_keep_alive_frequency: Frequency at which XenServer
    62      connection is checked.
    63      (default: '3600')
    64      (an integer)
    65    --acropolis_xen_host_slots: Number of host slots for concurrent operations for
    66      XenServer
    67      (default: '3')
    68      (an integer)
    69    --acropolis_xenserver_adapter_type: The adapter type to publish for XenServer
    70      virtual NICs.
    71      (default: 'vif')
    72
5. AHV の Linux OS / KVM の設定は変更しない。
AHV も、CVM も、どちらも CentOS なので設定変更は不可能ではありません。しかし Nutanix でチューニングされたものなので基本的には設定変更しません。
nutanix@NTNX-d9bf69a4-A-CVM:192.168.1.232:~$ cat /etc/centos-release
CentOS Linux release 7.3.1611 (Core)
nutanix@NTNX-d9bf69a4-A-CVM:192.168.1.232:~$ ssh root@192.168.5.1 cat /etc/centos-release
FIPS mode initialized
CentOS Linux release 7.4.1708 (Core)
nutanix@NTNX-d9bf69a4-A-CVM:192.168.1.232:~$
設定変更しそうになったら、魔改造を避けるためいったん思いとどまってドキュメントや製品サポートで許可されているか確認したほうがよいと思います。
Nutainx CE の AHV は商用版とパラメータが違ったりするとは思いますが、基本的に上記のような前提をもって AHV をためしてみるとよいと思います。
以上。
