Nutanix CE / AHV に、Terraform で VM を作成してみます。Terraform の Nutanix Provider を利用します。Nutanix CE は ce-2018.05.01-stable を利用しています。
Terrform の準備
今回の Terraform は、Oracle Linux 7 に RPM でインストールします。
[root@ol7-on-ahv ~]# cat /etc/oracle-release
Oracle Linux Server release 7.5
[root@ol7-on-ahv ~]# yum install -y --enablerepo=ol7_developer terraform
Terraform のバージョンです。
[root@ol7-on-ahv ~]# terraform -version
Terraform v0.11.11
今回の VM で利用する想定の、下記のリソースは作成してあります。それぞれ UUID を調べておきます。
- イメージ サービス: OS のディスクイメージを登録ずみ。
- ネットワーク: vlan-0 を作成ずみ。
ディスク イメージです。
CVM$ acli image.list | grep ol75-min-disk
ol75-min-disk                      kDiskImage  a73ebf41-ddc5-486b-977a-8e35bc70479f
Acropolis のネットワークです。
CVM$ acli net.list | grep vlan-0
vlan-0          47226b9d-85b5-46ee-ab05-90274a8554d2  kBridged  0
Terraform での VM 作成
Terraform の初期化(terraform init)を実行します。
[root@ol7-on-ahv tf]# terraform init

Initializing provider plugins...
- Checking for available provider plugins on https://releases.hashicorp.com...
- Downloading plugin for provider "nutanix" (1.0.0)...

The following providers do not have any version constraints in configuration,
so the latest version was installed.

To prevent automatic upgrades to new major versions that may contain breaking
changes, it is recommended to add version = "..." constraints to the
corresponding provider blocks in configuration, with the constraint strings
suggested below.

* provider.nutanix: version = "~> 1.0"

Terraform has been successfully initialized!

You may now begin working with Terraform. Try running "terraform plan" to see
any changes that are required for your infrastructure. All Terraform commands
should now work.

If you ever set or change modules or backend configuration for Terraform,
rerun this command to reinitialize your working directory. If you forget, other
commands will detect it and remind you to do so if necessary.
[root@ol7-on-ahv tf]#
tf ファイルは、下記のように作成しました。
terraform apply を実行します。
[root@ol7-on-ahv tf]# terraform apply
実行の様子は、下記のようになります。

途中で確認メッセージが表示されるので「yes」

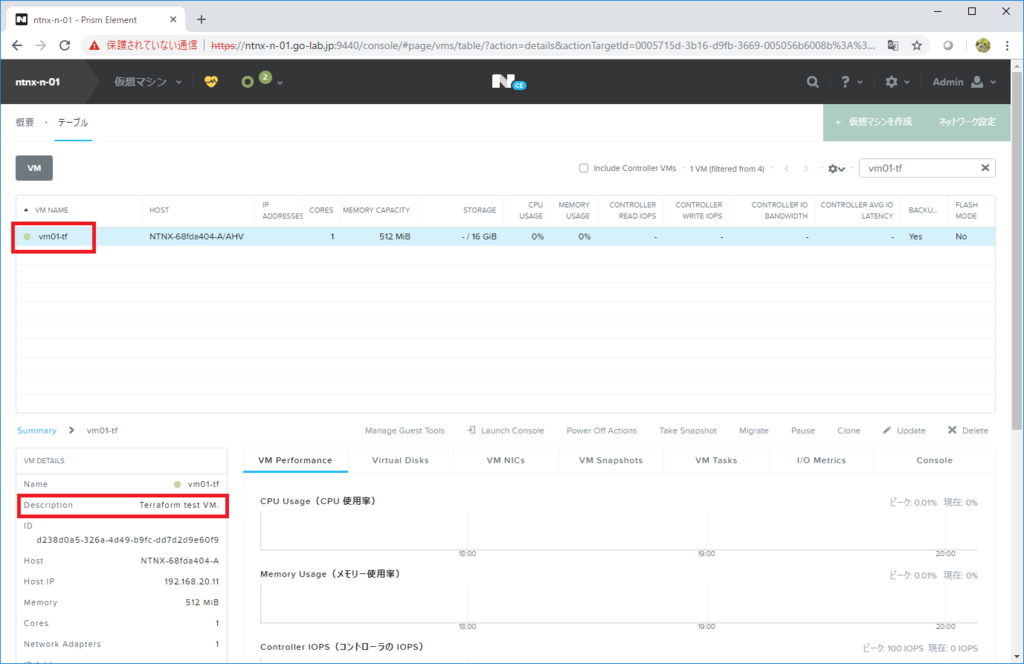
terraform apply が完了して、VM が作成されました。

Prism で見ると、VM が作成され、起動しています。

期待どおり、ディスク イメージとネットワークが割り当てられています。

以上。
