Nutanix CE の Acropolis Block Services(ABS) の Volume Group(VG)を、Linux VM に Guest iSCSI Initiator で接続してみました。
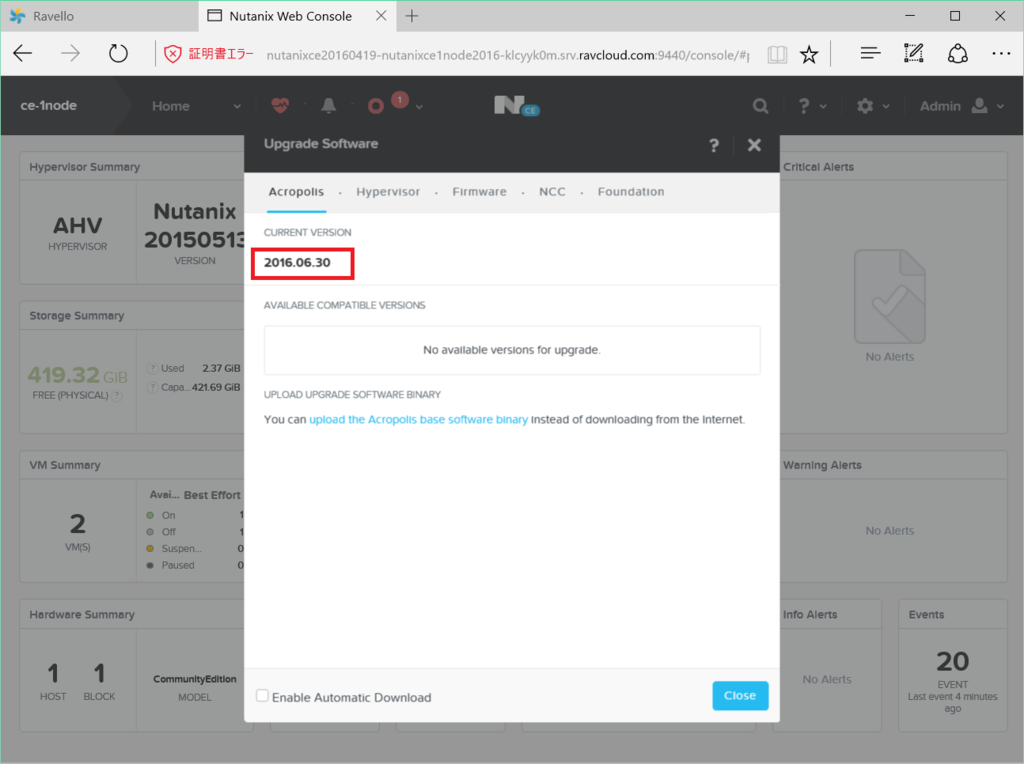
Nutanix CE のバージョンは、2016.06.30 です。
Linux での iSCSI Initiator インストール
今回は、Oracle Linux 7.2 を使用します。
[root@vm01 ~]# cat /etc/oracle-release
Oracle Linux Server release 7.2
iSCSI Initiator をインストールします。
[root@vm01 ~]# yum install -y iscsi-initiator-utils
iscsid を起動します。
[root@vm01 ~]# systemctl start iscsid
[root@vm01 ~]# systemctl enable iscsid
Created symlink from /etc/systemd/system/multi-user.target.wants/iscsid.service to /usr/lib/systemd/system/iscsid.service.
iSCSI Initiator の IQN を確認しておきます。
[root@vm01 ~]# cat /etc/iscsi/initiatorname.iscsi
InitiatorName=iqn.1988-12.com.oracle:2114fae09bc3
Prism で Data Services IP 設定
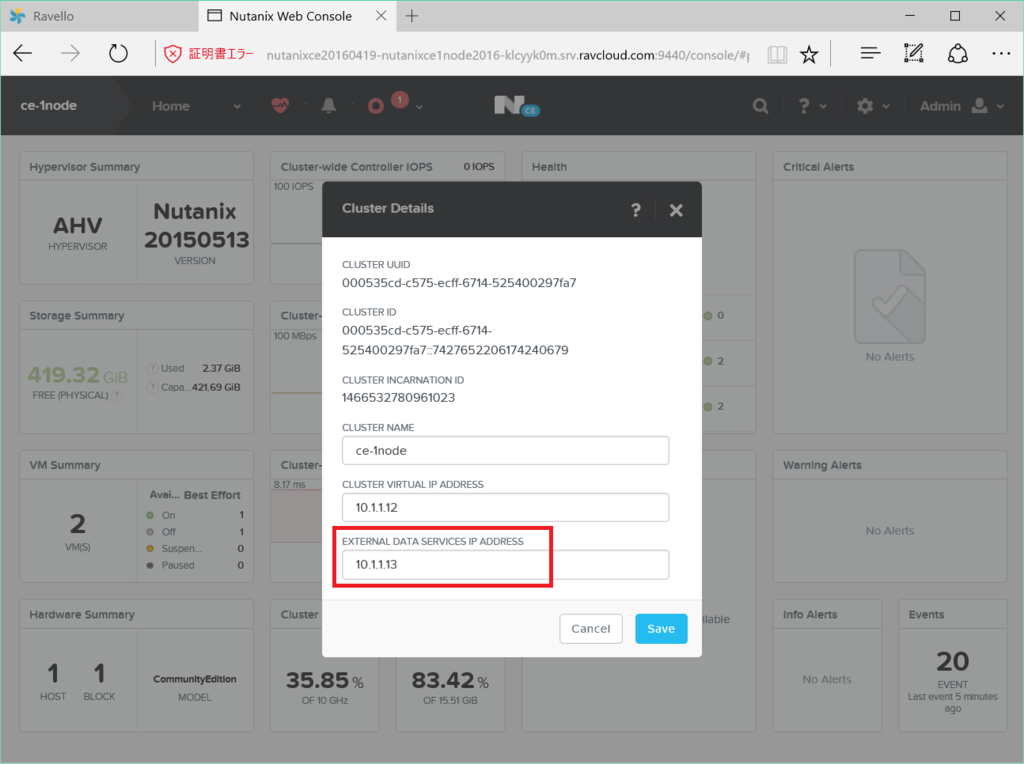
Prism で、「External Data Services IP address」を設定しておきます。今回は、10.1.1.13 を設定しています。
Prism での VG 作成
「Storage」 → 「+ Volume Group」を開きます。
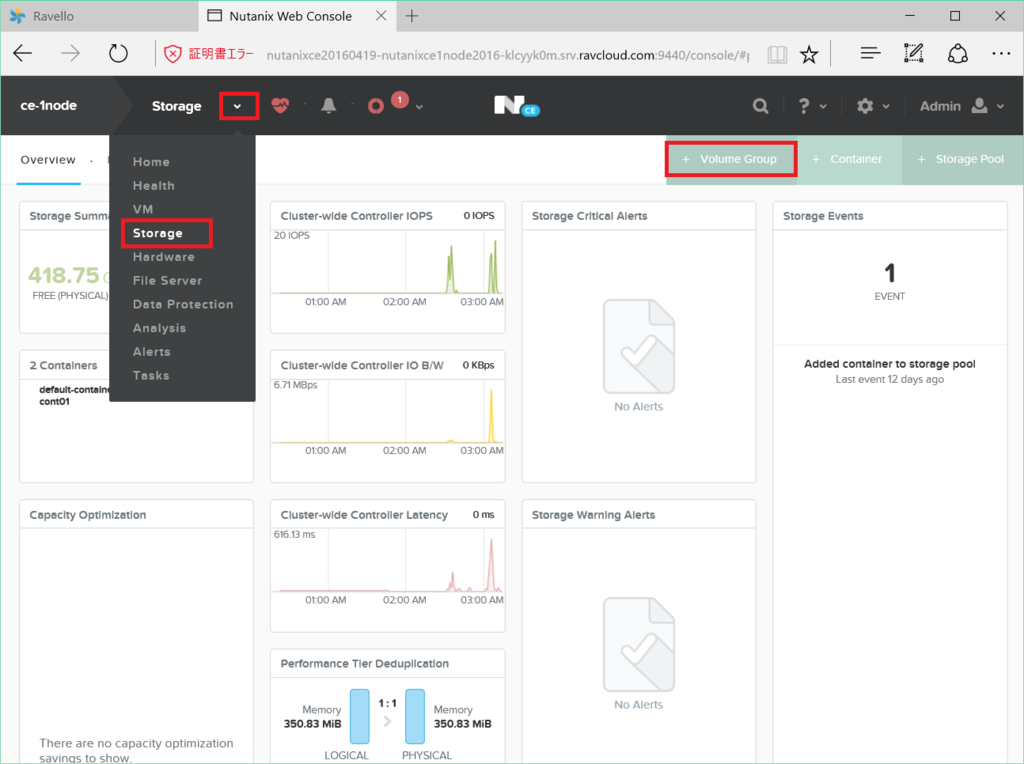
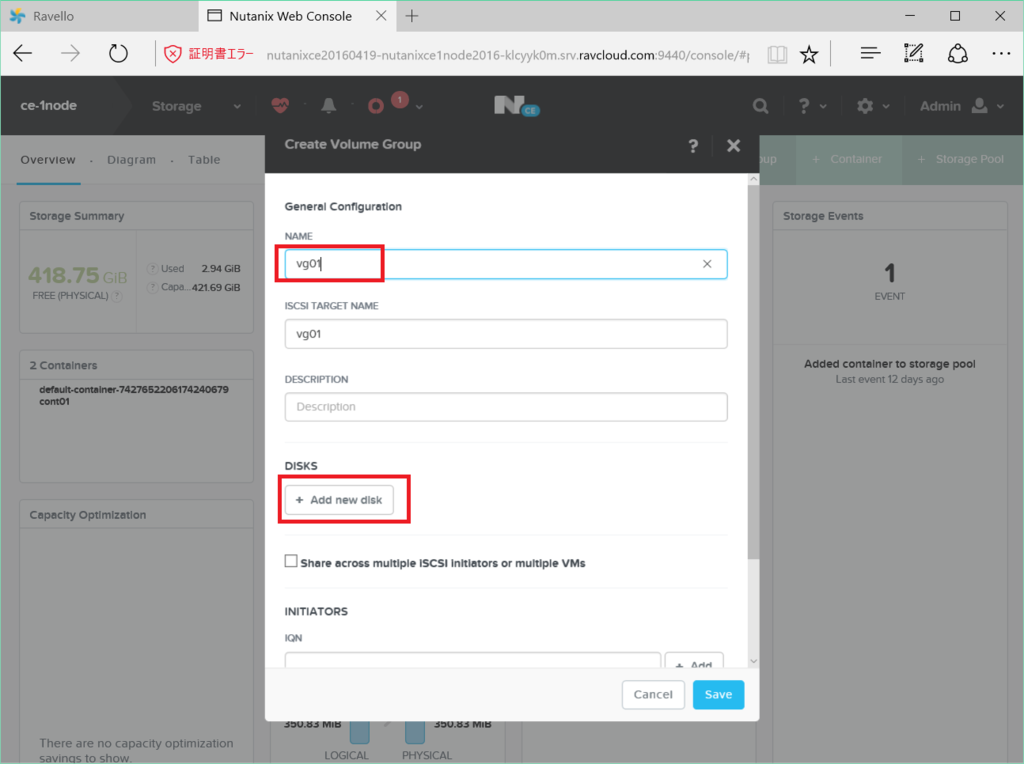
「vg01」という VG を作成して、vDisk を 2つ(8GB と 40GB)追加してみます。
NAME に「vg01」と入力して、「+ Add new disk」をクリックします。
8GB のディスクを追加してみます。
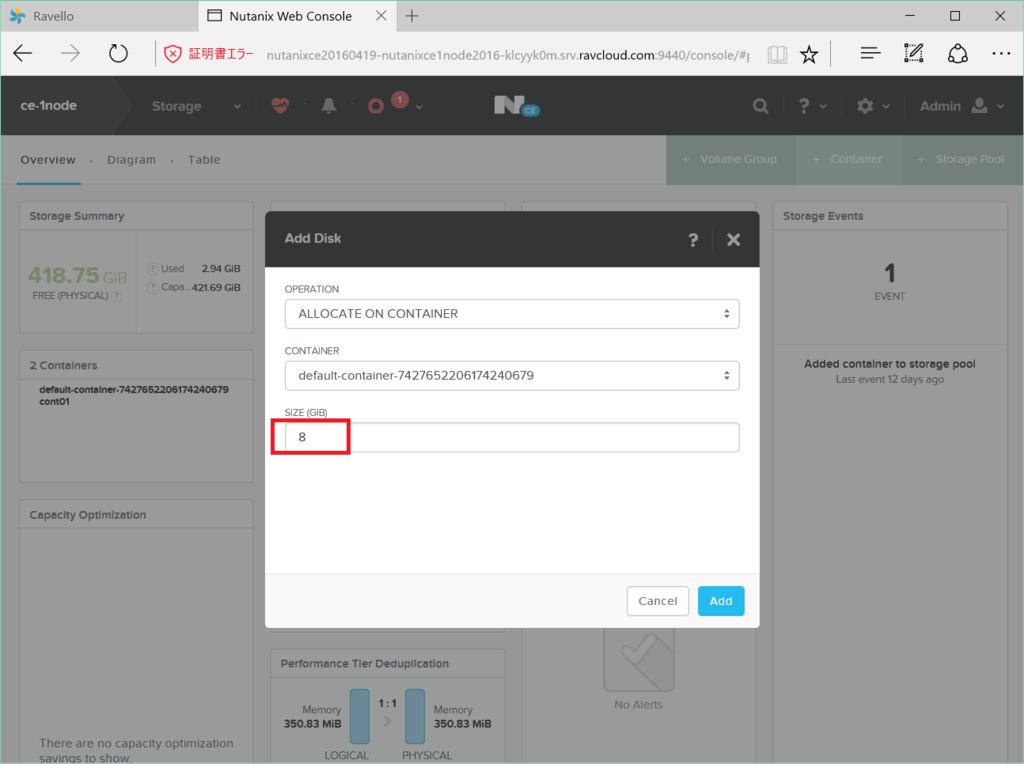
2つ目の 40GB のディスクを追加してみます。
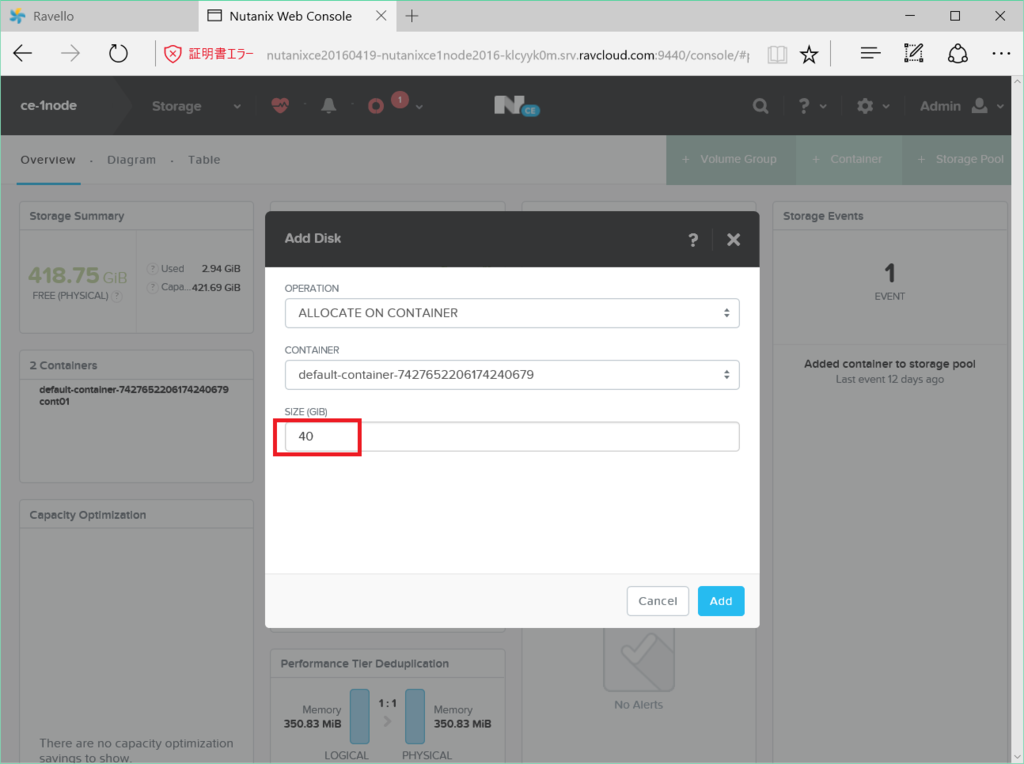
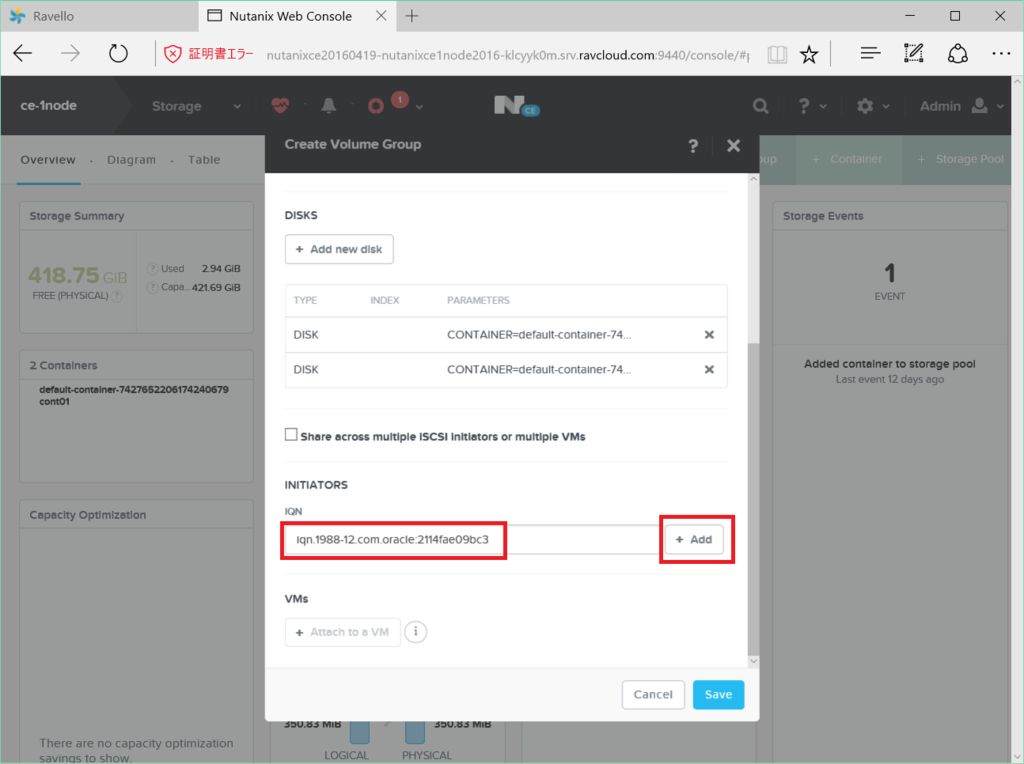
さきほどの IQN を登録します。
IQN を入力して、「+ Add」をクリックします。
「Save」します。
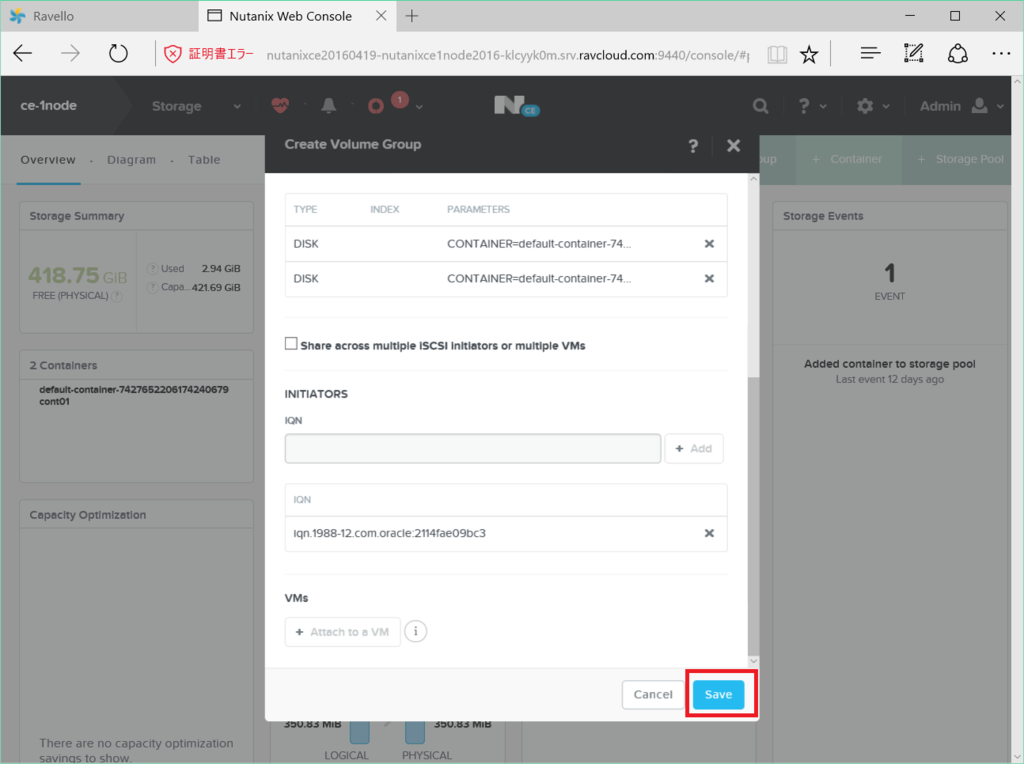
「Table」 → 「Volume Group」を開くと、vg01 が作成されています。
登録した IQN や VG に含まれる vDisk を確認できます。
Linux での iSCSI 接続
iscsiadm での接続
iscsiadm コマンドで接続してみます。discobery で、VG「vg01」のターゲットが 2つ見えます。
[root@vm01 ~]# iscsiadm -m discovery -t sendtargets -p 10.1.1.13
10.1.1.13:3260,1 iqn.2010-06.com.nutanix:vg01-7656347c-143a-4235-a5cb-4161f46021b0-tgt0
10.1.1.13:3260,1 iqn.2010-06.com.nutanix:vg01-7656347c-143a-4235-a5cb-4161f46021b0-tgt1
接続します。
[root@vm01 ~]# iscsiadm -m node -p 10.1.1.13 --login
Logging in to [iface: default, target: iqn.2010-06.com.nutanix:vg01-7656347c-143a-4235-a5cb-4161f46021b0-tgt0, portal: 10.1.1.13,3260] (multiple)
Logging in to [iface: default, target: iqn.2010-06.com.nutanix:vg01-7656347c-143a-4235-a5cb-4161f46021b0-tgt1, portal: 10.1.1.13,3260] (multiple)
Login to [iface: default, target: iqn.2010-06.com.nutanix:vg01-7656347c-143a-4235-a5cb-4161f46021b0-tgt0, portal: 10.1.1.13,3260] successful.
Login to [iface: default, target: iqn.2010-06.com.nutanix:vg01-7656347c-143a-4235-a5cb-4161f46021b0-tgt1, portal: 10.1.1.13,3260] successful.
iSCSI 接続のディスクは、/dev/sdb と /dev/sdc として認識されました。
[root@vm01 ~]# lsscsi
[0:0:0:0]    cd/dvd  QEMU     QEMU DVD-ROM     2.1.  /dev/sr0
[2:0:0:0]    disk    NUTANIX  VDISK            0     /dev/sda
[3:0:0:0]    disk    NUTANIX  VDISK            0     /dev/sdb
[4:0:0:0]    disk    NUTANIX  VDISK            0     /dev/sdc
8GB、40GB のディスクが見えるようになりました。
[root@vm01 ~]# fdisk -l -uS /dev/sdb

Disk /dev/sdb: 8589 MB, 8589934592 bytes, 16777216 sectors
Units = sectors of 1 * 512 = 512 bytes
Sector size (logical/physical): 512 bytes / 512 bytes
I/O size (minimum/optimal): 4096 bytes / 4096 bytes

[root@vm01 ~]# fdisk -l -uS /dev/sdc

Disk /dev/sdc: 42.9 GB, 42949672960 bytes, 83886080 sectors
Units = sectors of 1 * 512 = 512 bytes
Sector size (logical/physical): 512 bytes / 512 bytes
I/O size (minimum/optimal): 4096 bytes / 4096 bytes
パーティション作成
sfdisk コマンドでパーティションを作成します。セクタ指定などで微妙な場合でも、-f オプションでとりあえずパーティション作成できます。
[root@vm01 ~]# echo '2048,,L' | sfdisk -uS /dev/sdb
[root@vm01 ~]# echo '2048,,L' | sfdisk -uS /dev/sdc
パーティション作成できました。
[root@vm01 ~]# fdisk -l -uS /dev/sdb /dev/sdc

Disk /dev/sdb: 8589 MB, 8589934592 bytes, 16777216 sectors
Units = sectors of 1 * 512 = 512 bytes
Sector size (logical/physical): 512 bytes / 512 bytes
I/O size (minimum/optimal): 4096 bytes / 4096 bytes
Disk label type: dos
Disk identifier: 0x00000000

   Device Boot      Start         End      Blocks   Id  System
/dev/sdb1            2048    16777215     8387584   83  Linux

Disk /dev/sdc: 42.9 GB, 42949672960 bytes, 83886080 sectors
Units = sectors of 1 * 512 = 512 bytes
Sector size (logical/physical): 512 bytes / 512 bytes
I/O size (minimum/optimal): 4096 bytes / 4096 bytes
Disk label type: dos
Disk identifier: 0x00000000

   Device Boot      Start         End      Blocks   Id  System
/dev/sdc1            2048    83886079    41942016   83  Linux
[root@vm01 ~]#
ファイルシステムの作成 ~ マウント
EXT4 ファイルシステムを作成します。
[root@vm01 ~]# mkfs -t ext4 -L /u01 /dev/sdb1
[root@vm01 ~]# mkfs -t ext4 -L /u02 /dev/sdc1
ファイルシステムが作成されました。
[root@vm01 ~]# blkid /dev/sdb1 /dev/sdc1
/dev/sdb1: LABEL="/u01" UUID="4946b622-720d-4206-90b7-e3fe575844fa" TYPE="ext4"
/dev/sdc1: LABEL="/u02" UUID="aede39e1-8b99-45c8-bf20-1da01017e030" TYPE="ext4"
マウントポイントになるディレクトリを作成して、/etc/fstab に追記します。
[root@vm01 ~]# mkdir /u01
[root@vm01 ~]# mkdir /u02
[root@vm01 ~]# echo 'LABEL="/u01"  /u01  ext4  _netdev  0 0' >> /etc/fstab
[root@vm01 ~]# echo 'LABEL="/u02"  /u02  ext4  _netdev  0 0' >> /etc/fstab
[root@vm01 ~]# tail -n 2 /etc/fstab
LABEL="/u01"  /u01  ext4  _netdev  0 0
LABEL="/u02"  /u02  ext4  _netdev  0 0
ファイルシステムをマウントします。
[root@vm01 ~]# mount -a
[root@vm01 ~]# df -h /u01 /u02
Filesystem      Size  Used Avail Use% Mounted on
/dev/sdb1       7.8G   36M  7.3G   1% /u01
/dev/sdc1        40G   49M   38G   1% /u02
読み書きテスト
読み書きできました。
[root@vm01 ~]# echo "poke" > /u01/test.f
[root@vm01 ~]# echo "go" > /u02/test.f
[root@vm01 ~]# cat /u01/test.f /u02/test.f
poke
go
以上。
